Tuesday, August 24, 2010

Oatmeal Bars

It always seems that my family is running late.  It's not that we don't try.  We really do!  Even this entry is late!  Just for some reason getting out the door can be so difficult at times.  Because we're always late, we rarely have time to sit down to eat a good breakfast.  So I'm always on the lookout for fast & healthy things to serve my family when I'm throwing their breakfast like a frisbee at them as we pull out of the driveway.  OK, so the frisbee thing isn't exactly accurate, but it feels like it sometimes! =)

While James and I were taking our childbirth classes, the couples were supposed to take turns signing up to bring a snack for the group each week.  The first week, our instructor provided the snack.  Yep, you guessed it. She provided these oatmeal bars.  She encouraged us to not go overboard while we were getting the snack.  She said, "I just made some homemade granola bars real quick."  That's right.  I looked at her like she had lost her mind.  We tried them and they were really good!  My husband loved them!  And all the wives reading this knows that when your husband really likes something, you will do anything to reproduce that for him.  It's no secret that a happy husband has a happy belly. ;-)  To my surprise, they were really easy!!!  One of the best parts of all, they are saving us so much money!  We used to buy prepackaged granola bars that were expensive and not very filling.  My husband takes one on his way to work every morning, so I make a lot of them.

Anyway, the recipe came from a book called The Laptop Lunch User's Guide.  As I started looking around, I found that they sell reusable lunch box kits and promote healthy foods.  Cool!  I also found that they have a blog here.

The following is the word for word recipe and I'll put my tips at the end.

Oatmeal Bars
Prep time: 15 minutes
Cook time: 15 minutes

These oatmeal bars are a great alternative to many similar prepackaged products.  Freeze some for future use.  Preheat oven to 350 degrees.

3 cups "old fashioned" oats
2/3 cup whole-wheat flour
1/2 teaspoon baking soda
1/2 teaspoon salt
1 teaspoon ground cinnamon
1/3 cup honey
1/3 cup walnut oil
1 egg, beaten
3 tablespoons orange juice or water
1 teaspoon vanilla extract

  • Combine oatmeal, flour baking soda, salt, and cinnamon together in a large bowl and mix well.
  • In a separate bowl, combine honey,, oil, egg, orange juice (or water).
  • Combine the dry and wet ingredients and mix again.  
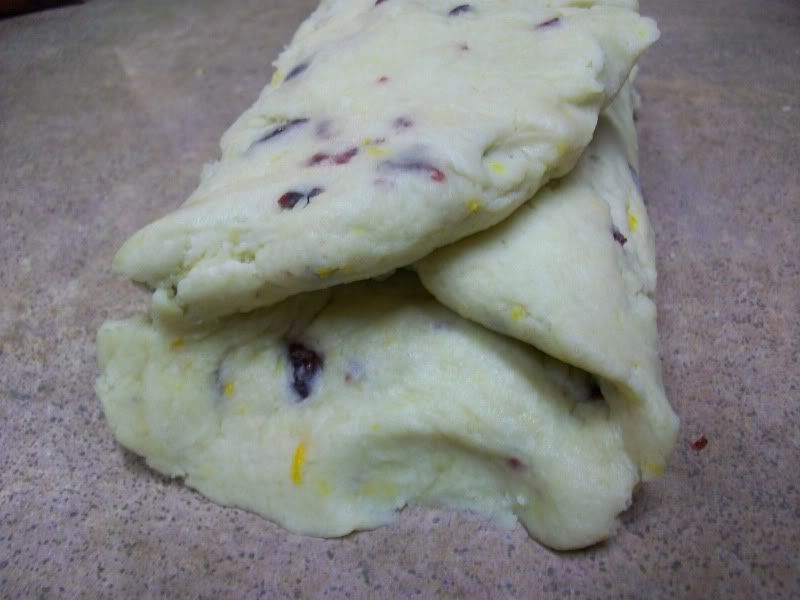
  • Using a spatula, press mixture firmly onto a lightly oiled cookie sheet, forming one large rectangle about 1/3 inch thick.
  • Smooth the edges with the edge of the spatula.
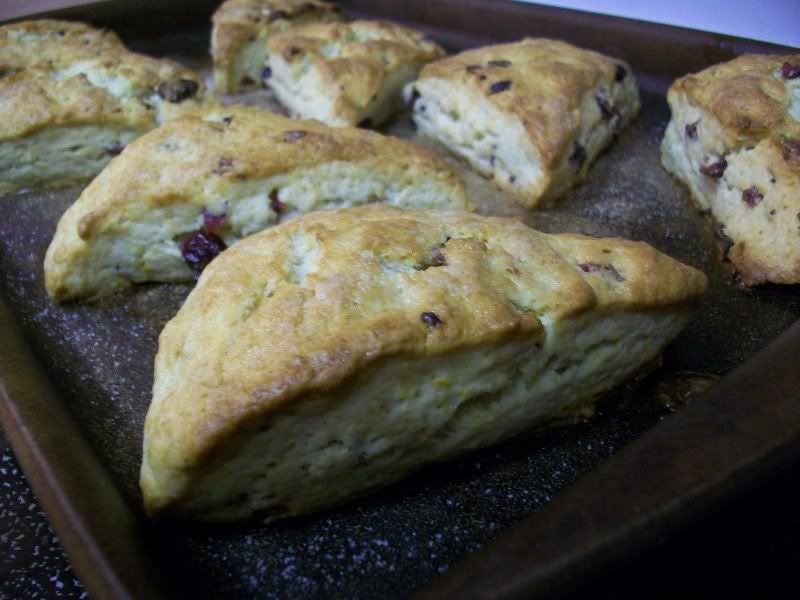
  • Bake at 350 degrees for 12-15 minutes, until light brown and firm.
  • Remove from oven and cool.
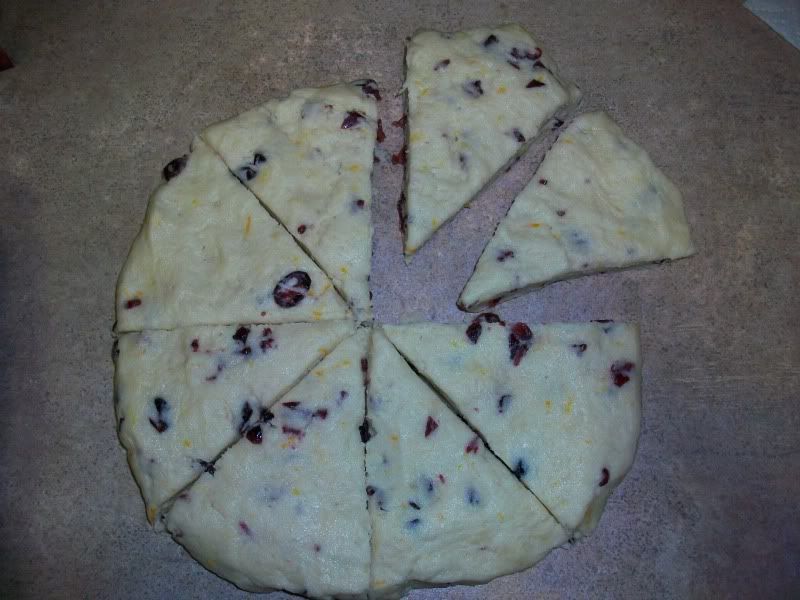
  • Using a sharp knife, cut the large rectangle into smaller 1 1/2 inch by 3 1/2 inch rectangles.
My tips for this recipe:
  • Walnut oil - We don't use walnut oil in our bars.  I substitute it for apple juice concentrate.  I actually do this a lot when I bake.  I keep it in a container in the freezer and just scoop it out with a measuring spoon when I need it.
  • Orange juice - I keep another container in the freezer with orange juice concentrate.  I measure out 1 1/2 tablespoons of orange juice and the 1 1/2 tablespoons of water for the recipe.
  • Vanilla extract - We have made them with the vanilla extract before, but now make them with almond extract now.  I love the flavor with the oatmeal
  • 1/3 inch thick - We make ours much more thick.  Ours are more like 3/4 inch thick.  They don't seem to fall apart easily.  Because we like to make ours more thick, I have to bake them longer.  It takes closer to 20 minutes in my stoneware.  
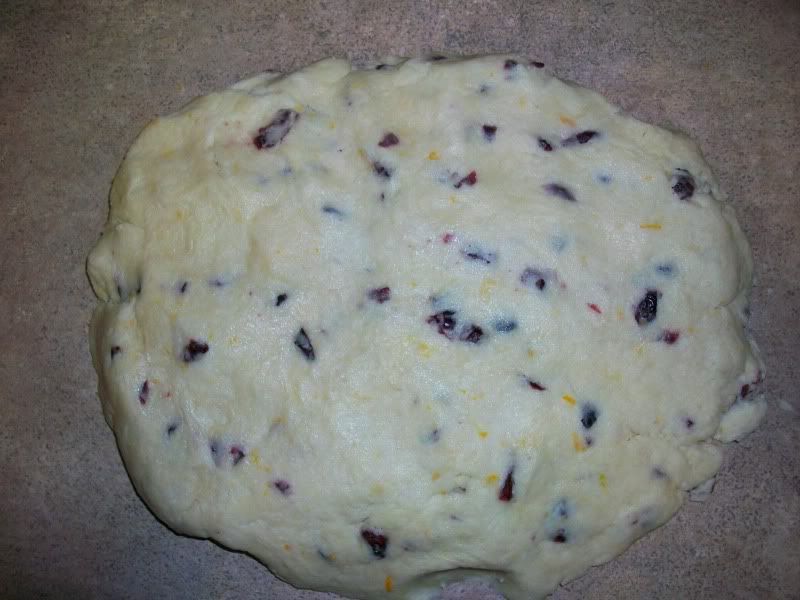
  • Extras - We add a few more ingredients.  I have a cranberry thing, I eat them year round.  We also like chocolate...and pecans.  So, we add 1/4 cup dried cranberries, 1/4 cup of mini chocolate chips, and 1/4 cup of chopped pecans.  You can add pretty much anything your imagination can think up.  Add, flax seeds, sunflower seeds, any nuts, dried fruits, coconut.  Anything you like!


All Thingz Related

The Girl Creative

It's a Blog Party 

Monday, August 16, 2010

Cinnamon Roll Pancakes


OK.  I know that pancakes aren't technically baking...but after I had these I knew that I HAD to share!  Not too long ago, I was browsing through cooking blogs (as I often do) and I found Big Red Kitchen.  It's an excellent blog with great recipes and beautiful pictures!  Anyway, I found a recipe for cinnamon roll pancakes and my jaw dropped.  I had to wipe a little bit of drool from my mouth and wipe my eyes to make sure they weren't deceiving me.  Yay for me...they weren't!  When I posted the recipe for the 90 Minute Cinnamon Rolls, I said that in my opinion, cinnamon rolls are the ultimate comfort food.  It's the truth!  But even at 90 minutes, sometimes that's too long and you need your fix now!  My family went nuts over them.  It has quickly become a frequent request for Saturday morning breakfasts.  Go ahead and try them.  I triple dog dare you!

I will be putting the original recipe on here word for word with my pictures and then adding the things I changed at the bottom.

Cinnamon Roll Pancakes

For the Cinnamon Filling...
In a large bowl, using a hand mixer, mix until smooth:
1 stick softened butter, almost melty
1 cup packed brown sugar
2 T. cinnamon

Using a rubber spatula to scrape the sides, pour this mixture into a large pastry bag that had been opened and stood up in a tall tumbler. A large ziptop bag with the edges folded over the tumbler would work too. 


For the Cream Cheese Icing...
In the same bowl that you used for the cinnamon filling, mix together, using the hand mixer again:
2 cups powdered sugar
2 ounces cream cheese
1 tsp vanilla
4 T. milk

Mix until smooth and pour into a second pastry bag just like you did with the cinnamon mixture above.

For the Pancakes...
In the same bowl that you used for the filling and the icing- no need to be using or washing too many bowls now- mix together:


2 cups pancake mix- I used Bisquick's Heart Healthy
3 eggs
1/4 cup canola or vegetable oil
1 T. powdered sugar
1 1/4 cups milk
the hand mixer, blend until smooth. In a large non-stick skillet, over medium to medium-low heat, and using a 1/4 cup dry measuring cup, ladle 2 pancakes. Snip the tip off the pastry bag containing the cinnamon filling so that the opening is a scant 1/2 inch wide, swirl over cooking pancakes in a circular motion- 3 go-a-rounds should do. Continue to cook the pancakes until bubbles form evenly through each cake. Gently flip each pancake over and cook another 30-45 seconds, remove to a serving platter and serve immediately or keep warm covered in a warm oven. Continue with the rest of the batter. Place 2-3 pancakes side by side (too pretty to stack!) on each person's plate and drizzle each one with icing. Serve maple syrup, bacon or sausage, and fruit on the side. Makes 18 pancakes.

Note- Using a damp paper towel, wipe your skillet after each pancake is made. This will keep the next pancake from sticking to any of the cinnamon filling that has leaked onto your skillet or griddle. 
After I swirled each pancake with the cinnamon filling, I returned the pastry bag, tip down in the tumbler. This kept it from leaking all over. 
Store any leftover icing in the refrigerator for future use. 


My tips for this recipe:


  • Pancake mix: I don't typically use a prepared mix. I made the pancakes that are found in my Betty Crocker cook book. Here's the recipe:

Prep: 5 min; Cook: 10 min
Makes nine 4-inch pancakes

1 large egg
1 cup all-purpose or whole wheat flour
3/4 cup milk
1 tablespoon granulated or packed brown sugar
2 tablespoons vegetable oil
3 teaspoons baking powder
1/4 teaspoon salt
Margarine or shortening

1. Beat egg in medium bowl with hand beater until fluffy.  Beat in remaining ingredients except margarine just until smooth. 
2. Heat griddle or skillet over medium heat or to 375.  Grease griddle with margarine if necessary.  
3.  For each pancake, pour slightly less than 1/4 cup batter from cup or pitcher onto hot griddle.  Cook pancake until puffed and dry around edges.  Turn and cook other side until golden brown.

  • Cream Cheese Icing:  *Sigh*  Sadly I didn't have any cream cheese.  So typical, you know?  So I used this for my icing:
2 Tbsp butter, melted 
pinch of salt
2 -3 cups powdered sugar
2-3 Tbsp milk
1/2 tsp almond extract

Whisk all ingredients until smooth.  If needed add more milk 1 Tbsp at a time until it has reached drizzling consistency.

  • Serve with syrup:  We didn't need or want any syrup on ours.  It was plenty sweet with just the icing.  (My mouth is watering right now just thinking about it!)


Enjoy your breakfast!!!


The Girl CreativeMaking


It's a Blog Party


Saturday, August 14, 2010

Yay for our Home A La Mode giveaway winner!!!

We have a winner!  We have a winner!


Comment #123 AKA Amanda from Farmgirl Writes & Chicken Scratch Designs!!!  Comment #123 said, "I love the "Nana's Bib Apron"!"


A big huge congratulations to you Amanda!!!


I hope you enjoy your fancy new Kay Dee Designs gingham apron from Home A La Mode!  I can't wait to see what color you pick out.  (My vote is the green one!)  

Thank you to Home A La Mode for such a fun prize to giveaway!  Be sure to check out Home A La Mode for all of your household needs.  They are the cutest online boutique EVER!  They have kitchen items, Moda fabrics, crafts, patterns (including the new patterns by my lovely sister-in-law, Angela the Moda Home Mom),  laundry room needs, and even something for your pet!  As if Home A La Mode couldn't get any more fun, they also have a whole line of kid's toys and games.  Check out this uber cute sock monkey:
OMGSH!  I just think he's adorable!

Oh my, I almost forgot!  They have purses and bags by Amy Butler!  The best part about them is that right now they are 50% off!!  Check them all out here.

Thank you so much for participating in my first giveaway!  Be sure to congratulate Amanda on her awesome win!  It's so nice to meet you all!  Happy Saturday to you!


[None of these pictures are mine.  They were taken from the Home A La Mode website.]

Monday, August 9, 2010

Kolaches

If you're digging my plate, there is still a very limited supply available at Home A La Mode in 8" and 12"


Being a native Texan, it's hard to imagine life without kolaches!  For those of you that need to be educated, a kolache is a Czech sweet bun made from yeasted dough and usually having a fruit or poppy seed filling.  They are such a yummy little piece of heaven.  There are some people that will try to give you a "kolache" with sausage inside.  My friends, please hear me when I say, "THAT IS NOT A KOLACHE!!!  IT IS A PIG IN A BLANKET!!!"  There.  I got that out of my system. *Panting*  If you want the actual Tex-Czech name for a 'Pig In A Blanket' it is "klobasnek"  If you want to join my anal-retentive kolache world, here's a pretty good read on the differences.


Anyway, the best place to buy these little goodies is in a small town called West, TX at The Czech Stop.  It is halfway between Dallas and Austin.  It's just a little far for me to drive there to go get one.  =(  But, I have found a recipe that is just about as close as you can get to the ones at The Czech Stop.  *High pitched squeal!*  I found the recipe at The Homesick Texan.  She has such pretty pictures of the finished product too!  Thanks Homesick Texan for sharing! 


The following is the word for word recipe with my pics added in.  I will post a few of my tips at the end.


Kolaches 
(adapted from recipes found in Texas Monthly and the HoustonChronicle as found on The Homesick Texan)
Makes 18 rolls


Ingredients:
1 package of active dry yeast
1 cup of warm milk
1/4 cup sugar
3 cups of all-purpose flour
2 eggs
3/4 cup of melted butter
1 teaspoon of salt

Method:
In a large bowl, combine yeast, warm milk, sugar and one cup of flour. Cover and let it rise until doubled in size.
Beat together eggs, 1/2 cup of melted butter (reserve 1/4 cup for brushing on the pastry) and salt.
Add egg mixture to yeast mixture and blend.
Stir in about two more cups of flour, 1/2 cup at a time. The dough should be soft and moist.
Knead dough for about 10 minutes on floured surface. Don't worry, it’s a joy to knead as the dough is smooth and highly malleable.
Put dough in a greased bowl and let rise covered until doubled in size—about an hour.
After dough has risen, punch it down and pull off egg-sized pieces. In your hands, roll pieces into balls and then flatten to about three inches in diameter. Brush with melted butter.
Place flattened pieces on a greased cookie sheet, cover and let rise again for another half-hour.
After second rising, with your finger gently make an indention in the center of the dough (be careful not to flatten it too much)


and fill with one tablespoon of fruit filling (recipe to follow


and sprinkle with posypka (recipe to follow).

Bake in oven at 375 degrees for 12 to 15 minutes. Brush with melted butter when you take them out of the oven and serve warm.


Kolache filling
Ingredients:
1 pound of dried fruit such as apricots or prunes.
Sugar to taste
1/4 teaspoon of cinnamon
Lemon zest

Method:
Soak the dried fruit in water for a few hours or overnight.
When fruit is re-hydrated, cook on low for 15 minutes, adding sugar to taste (I find the fruit sweet enough so I don’t add sugar, but you may prefer it sweeter), cinnamon and lemon zest. Mash with a potato masher until you have a puree.


Posypka

Ingredients:
1/2 cup all-purpose flour
1/2 cup sugar
1 tablespoon butter
1/8 teaspoon cinnamon

Method:
Mix all ingredients until crumbly.


My tips for this recipe:
  • Dough: I needed closer to 4 cups of flour vs. 3.  Start with 3 cups and if the dough is too sticky to knead, add  flour 1/4 cup at a time.
  • Filling: I did not try the recipe.  I used a cherry fruit spread instead.
  • Posypka: I found that it made way more than needed.  Feel free to cut it in half.  You will still have plenty to spare.  You also may need to add a little bit of butter.


Creations by Kara


MakingThe Girl Creative


It's a Blog Party

Home A La Mode Giveaway!!!!

When you think of wearing an apron do you think of these women?
Sigh.  Yes, it's June Cleaver
Not sure who this lady is...


It's not easy to find a cute AND functioning apron!  It seems so many of them are either cute OR functioning.  When I say cute, I don't mean bunnies and teddy bears.  Don't get me wrong...bunnies and teddy bears have their place.  But in my opinion, that place is not on my apron. =)  When I say "cute", I mean pretty, stylish, flirty, girly, etc.  I think you get the picture.  


Good news! You can find ultra "cute" aprons at Home A La Mode!!!  This is the one that I have:


I also have the matching towel.  It is so nice and big and perfect for covering my doughs to let them rise.
OK, OK!  I'm a  last minute person and no matter how hard I try...LATE!

How many ways can I say CUTE?!  Home A La Mode has over 55 aprons to choose from by many designers including, Kay Dee Designs, Kate Spain, Moda Home, Vanilla House, Cindy Taylor Oates, Sew Liberated, and Nana's.  While you're visiting Home A La Mode, be sure to check out all of their other kitchen items as well.  They have napkins, tablecloths, tableware, pot holders, towels, and other accessories

Now....for the giveaway.  Home A La Mode has offered to let you choose your favorite color of one of these super cute aprons by Kay Dee Designs!!!  I'm in love with the green one.  As if that isn't cool enough, they are doing the exact same giveaway on Home A La Mode's blog!  Could you just scream?


HOW TO ENTER...  


MANDATORY ENTRY:

  • Visit Home A La Mode then leave a comment telling me which apron is your favorite other than the one I reviewed or the one that is being given away! (1 entry)


BONUS ENTRIES:  (LEAVE A SEPARATE COMMENT FOR EACH ENTRY)


  • Follow my blog with Google Friend Connect. (1 entry)
  • Follow Home A La Mode's blog and enter their giveaway for another apron! (1 entry)
  • Subscribe to this blog via email. (1 entry)
  • FOR 3 EXTRA ENTRIES - Blog about this giveaway, with a link to my blog and come back and leave the link to your blog post. Post THREE separate comments that you've blogged about this. 
  • FOR 10 EXTRA ENTRIES - Purchase something from Home A La Mode and leave me a comment with the last 3 digits of your order number that you receive in your confirmation email from Home A La Mode.  Be sure to tell Home A La Mode you heard about them from me! P.S. Share what you couldn't live without!  We're all dying to know!


HURRY and ENTER by midnight Friday, August 13, 2010!  The winner will be chosen at random by Random.org and announced on Saturday, August 14th.


Good luck!


[Pictures of aprons and towel used in this post are property and copyrighted by Kay Dee Designs] 


This policy is valid from 9 August 2010

 This blog is a personal blog written and edited by me. This blog does not accept any form of cash advertising, sponsorship, or paid topic insertions. However, we will and do accept and keep free products, services, travel, event tickets, and other forms of compensation from companies and organizations.

 This blog abides by word of mouth marketing standards. We believe in honesty of relationship, opinion and identity. The compensation received may influence the advertising content, topics or posts made in this blog. That content, advertising space or post will be clearly identified as paid or sponsored content.

 The owner(s) of this blog is not compensated to provide opinion on products, services, websites and various other topics. The views and opinions expressed on this blog are purely the blog owners. If we claim or appear to be experts on a certain topic or product or service area, we will only endorse products or services that we believe, based on our expertise, are worthy of such endorsement. Any product claim, statistic, quote or other representation about a product or service should be verified with the manufacturer or provider.

 The owner(s) of this blog would like to disclose the following existing relationships. These are companies, organizations or individuals that may have a significant impact on the content of this blog. We are employed by or consult with: Tomoson.com.

To get your own policy, go to http://www.disclosurepolicy.org

Monday, August 2, 2010

Cranberry Orange Cream Scones


I had to double check to make sure I did actually type "Cranberry Orange Cream Scones" and not "Heaven On A Plate".  My husband's grandmother, Grandma B, has been visiting from Nebraska for about 3 weeks.  We had the privilege of having her come to our home and spend the day with us.  Grandma B is originally from England, so I was trying to think of some sort of a yummy English snack that I could serve during our visit.  Naturally, I thought of scones.  I searched high and low on the internet for a yummy scone and finally found this recipe on House of Annie.  These scones turned out beautifully and so tasty!  They have a ridiculous amount of butter in them which makes them very moist.  The original recipe called for currants, with a substitute of cranberries and orange.  Obviously, I chose to go with the cranberries and orange.  I can't help it...I have a thing for cranberries.   =)  By the way, the scones were Grandma B approved, so they're safe for you to make!

Cranberry Orange Cream Scones
As seen in the Home A La Mode catalog!!
Prep: 15 mins; Bake: 12-15 mins
Makes: 8-16 servings
  
2 cups (10oz) unbleached all-purpose flour
1 Tbsp baking powder
3 Tbsp sugar (more for sprinkling)
1/2 tsp salt
5 Tbsp (2.5oz) cold, unsalted butter
1/2 cup dried coarsely chopped cranberries
1 Tbsp grated orange zest
1 cup heavy cream (more for brushing)

Preheat oven to 425 F

Place flour, baking powder, sugar and salt in a bowl and mix.  Cut in butter until it resembles coarse meal.

Add cranberries and orange zest.  Mix.  Gradually pour in heavy cream about 1/4 cup at a time and lightly mix until the dough comes together in a shaggy ball.  It will still have lots of loose, sandy pieces.  If you think it's too loose and sandy, you can add a little bit more cream without affecting the outcome.  

Place dough on a floured surface ad roughly work it into a ball.  

Press the ball down into a rectangular shape.

Fold the dough into thirds.
Press the dough down again into a rectangular shape in a vertical position and fold into thirds again.  The less you work your dough, the flakier it will be.

Press the dough down into a circle.  Cut into 8 large or 16 small triangles. (Trust me when I say that cutting into 16 triangles is a waste of time.  These are so good that you will eat two little ones. You may as well go for one big one.)  =)
Separate the individual scones and place them on a baking tray that is lined with parchment paper. (I put mine on a well seasoned baking stone without the parchment paper.)

Brush the top of the scones with cream and then sprinkle each one with a little sugar.

Bake for 12-15 mins until golden brown on top.


Stay tuned!!!  I am doing my first fun giveaway very soon!  Follow me so that you don't miss the announcement!  Here's a tasty teaser for your taste buds...

The Girl CreativeMaking
Also linking up at:

LinkWithin

Related Posts with Thumbnails